 ChipBuddy
← Home
ChipBuddy
← Home
Evaluating Quality, Pitfalls & Quick Reference
You have run the concurrent engine. The macros are scattered across the core, the standard cells are spread into a continuous blob, and the log says the placement converged. Now comes the part that separates an engineer who ran placement from one who owns it: deciding whether the result is good enough to carry forward, and knowing exactly what to turn when it is not. This final chapter is your judgment toolkit. We will look at how to read a concurrent-placement result across every dimension that matters, build a sign-off checklist you can defend in a review, catalogue the pitfalls that bite almost everyone, and close with a consolidated command quick-reference and an interview cheat-sheet that ties the whole book together.
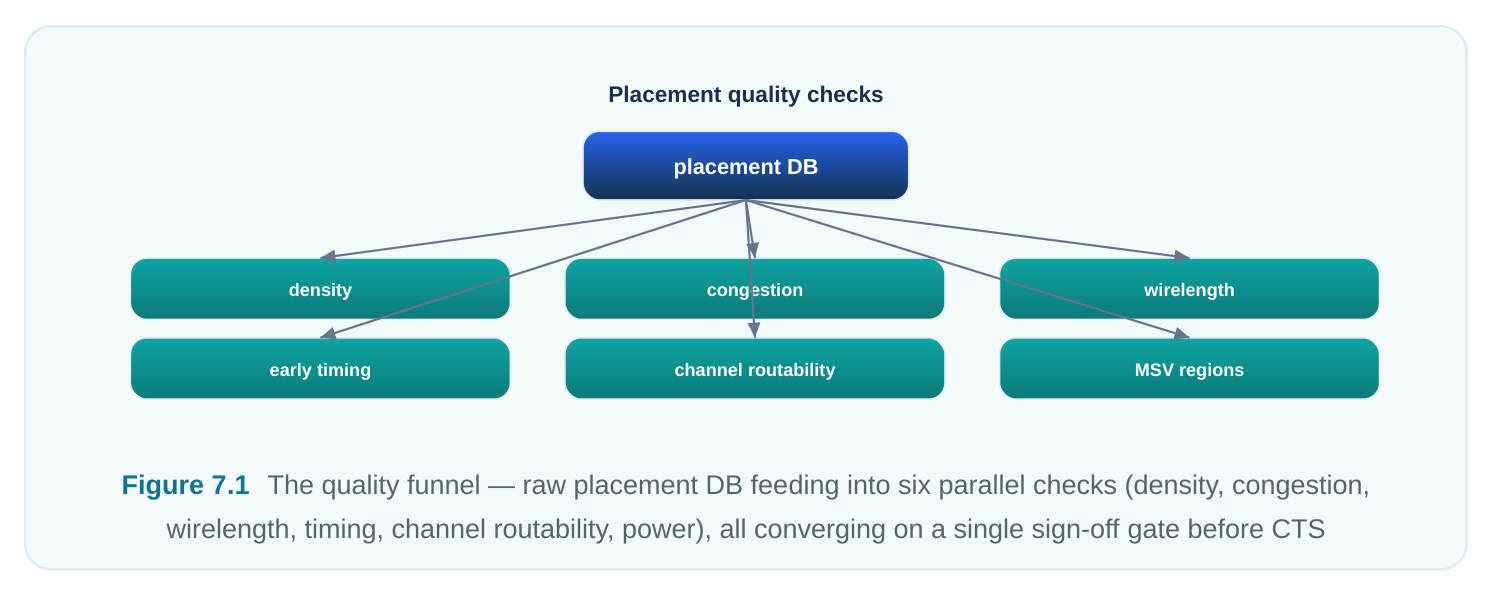
7.1 How to Judge a Concurrent Placement Result
A mixed placement is not "good" or "bad" on one axis. It is a balance point, and you judge it by triangulating several signals at once. If you only look at one number you will be fooled — a beautiful wirelength figure can hide a congestion disaster, and clean timing can mask a routing channel that is too narrow to ever connect. Here is the full set of signals, what each one tells you, and roughly where you want to land before sign-off.
| Quality axis | What you measure | What healthy looks like | Why it matters |
|---|---|---|---|
| Utilization / | Cell area / available site | Global comfortably below the | Over-dense regions |
| density | area, plus local density map | cap; no large red local hotspots | cannot be legalized or routed |
| Congestion | Overflow on horizontal/ vertical tracks, global-route | Few or zero overflowing GCells; no clustered red | Predicts whether the design can actually route |
hotspots
| Total wirelength | Sum of estimated net length | Stable or improving vs. prior | Proxy for power, timing, |
|---|---|---|---|
| iteration | and routing effort | ||
| Critical-path | Length on timing-critical nets | Short, direct, no detours wirelength | Long critical nets become unfixable timing |
later
| Early timing | Worst and total negative | Small, recoverable negative | Confirms the floorplan |
|---|---|---|---|
| (WNS/TNS) | slack on a placement-level | numbers | supports the clock target |
estimate
| Macro-channel | Width and track count of | Channels wide enough for | Starved channels strand |
|---|---|---|---|
| routability | inter-macro channels | nets plus power | routing forever |
| Pin access | Reachability of macro and cell pins | No blocked or shadowed pins | Inaccessible pins force detours or DRCs |
| Power | Coverage of the power grid | No cells stranded from | Cells without power |
| feasibility | over placed cells | straps/rails | connection are dead |
The discipline is to look at these together. A practical reading order is: density first (is the design even placeable?), then congestion (can it route?), then timing and wirelength (is it fast and efficient?), and finally the macro-specific checks — channels, pins, and power — which are the things unique to mixed placement and the things interviewers love to probe.
# A compact concurrent-placement quality sweep
report_placement_density   -map density.rpt
report_congestion          -map congestion.rpt -overflow
report_wirelength          -total -critical
report_timing              -setup -max_paths 50
report_macro_channels      -min_width -routability
7.2 Reading the Maps, Not Just the Numbers
Numbers summarize; maps localize. A density of 70% global tells you nothing about the 96% cluster forming a ring around a macro corner. Always overlay the maps before you trust a headline number. When you open a congestion map, you are looking for three patterns. Diffuse mild congestion across the core is usually fine and will resolve in detailed placement and routing. A tight, bright cluster is a real
hotspot and needs intervention. And a ring of congestion hugging a macro edge almost always means a starved channel or a macro pushed too close to a neighbor — a structural problem, not a noise problem.
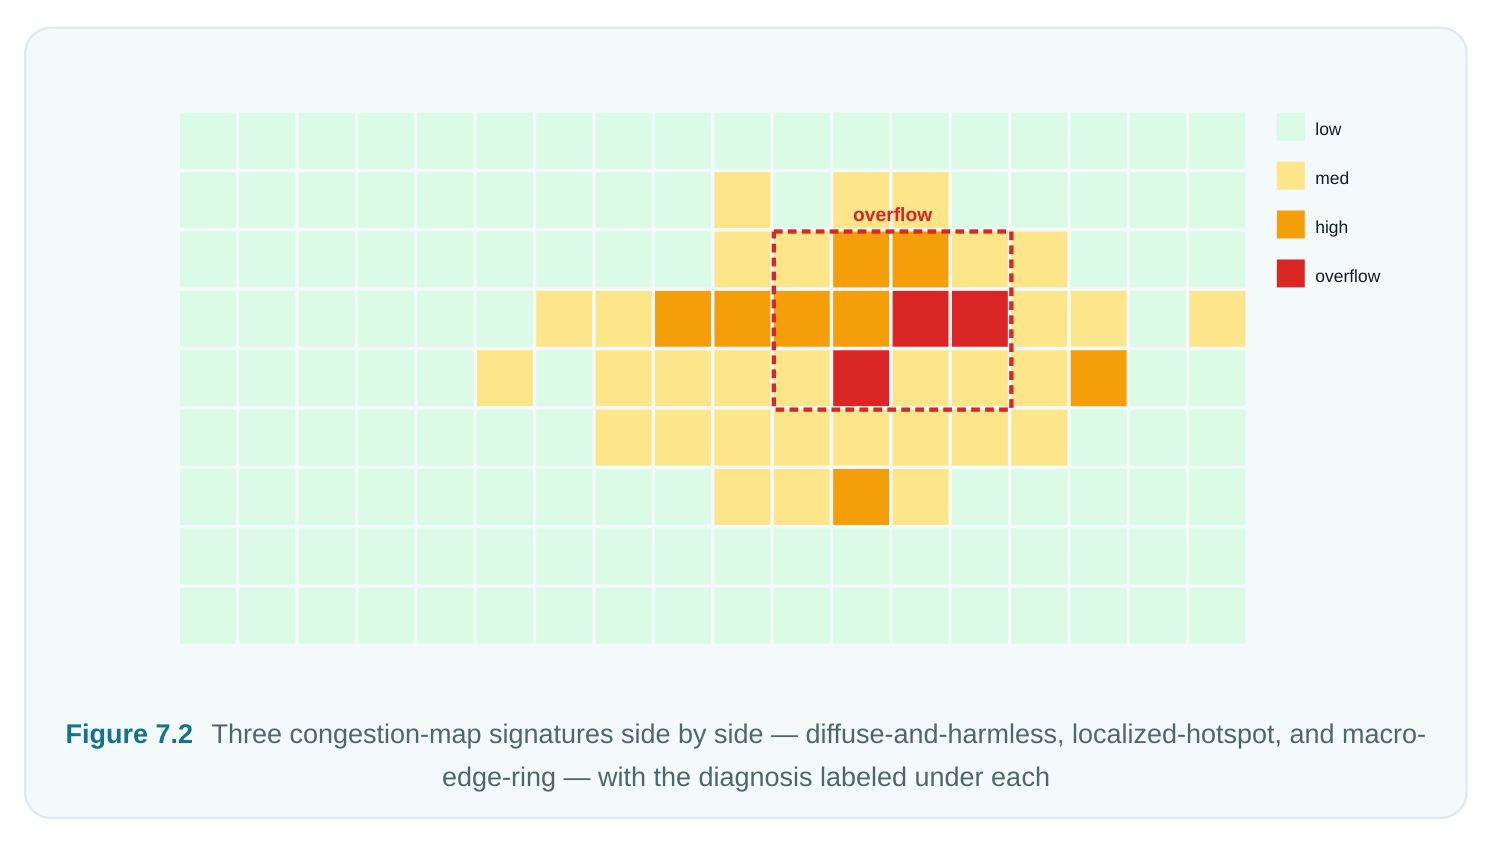
For density maps, the tell is gradient. A smooth gradient from the I/O ring inward is natural. A sharp cliff — dense on one side of a line, sparse on the other — usually marks where the engine packed cells against an obstacle (a macro, a blockage, a region boundary) and could not spill them anywhere.
7.3 The Placement Sign-Off Checklist
Before you hand a mixed placement to clock-tree synthesis, walk this checklist. Treat any unchecked item as a blocker, not a warning — issues that survive into CTS get an order of magnitude harder to fix.
[ ] Global density below target cap; no local hotspot above the legalization limit
[ ] Congestion overflow zero or within the agreed budget; no clustered red
[ ] All macros legal: on-grid, non-overlapping, halos/keepouts honored
[ ] Inter-macro channels meet minimum routable width (nets + power)
[ ] Macro and cell pins accessible; no shadowed or blocked pins
[ ] Power grid covers all placed cells; no stranded standard cells
[ ] Early WNS/TNS within recoverable range for the clock target
[ ] Critical nets short and direct; no long detours around macros
[ ] Multi-supply-voltage (MSV) cells inside their correct voltage regions
[ ] Don't-touch / pre-placed objects unchanged; bounds and groups respected
[ ] Placement blockages and partial blockages still in place and effective
[ ] Result reproducible — same inputs, same seed, same outcome
The last item matters more than people expect. A placement you cannot reproduce is one you cannot debug. Lock the seed and the input ordering before you call anything final.
7.4 The Most Common Mixed-Placement Pitfalls
Almost every problem in concurrent macro-plus-cell placement falls into one of a handful of buckets. Learn these and you can diagnose most reviews on sight.
| Pitfall | Symptom you see | Root cause | Fix |
|---|---|---|---|
| Macro pile-up | Macros clumped in one corner, sparse elsewhere | Engine minimized wirelength to one connectivity cluster | Add spacing constraints; seed macro guides; spread with region bounds |
| Starved routing | Congestion ring on | Macros placed too close; | Enforce minimum channel |
| channels | macro edges; unroutable | no channel reservation channels | width; add macro-to-macro spacing |
| Halo / keepout | Cells inside halos; | Halos not defined or | Define halos before placement; |
| violations | spacing DRCs near | applied after placement | re-legalize; verify keepouts |
macros
| Domain cells | MSV/voltage cells | Region constraints | Apply hard region bounds; |
|---|---|---|---|
| out of region | outside their power | missing or soft region | rerun with domain-aware placement |
| Over- | Engine fights itself; poor | Too many fixed/bounded | Relax to soft guides; fix only |
| constrained | wirelength; long runtime | macros leave no freedom | what truly must be fixed |
macros
| Congestion | Bright local clusters away | Logic clustering, high pin | Add density screens; spread |
|---|---|---|---|
| hotspots | from macros | density, narrow region | cells; adjust effort/target density |
| Pin-access | Shadowed pins; detoured | Macros abutting or pins | Reorient/flip macros; add edge |
| blockage | nets; local DRCs | facing a blockage | clearance; reserve pin-side |
space
| Stranded power | Cells with no rail/strap | Grid built before macros | Rebuild/extend grid post- |
|---|---|---|---|
| connection | settled, or macro over grid | macro-placement; verify |
coverage Notice the recurring theme: most of these are floorplan problems wearing a placement costume. The concurrent engine will faithfully optimize whatever you hand it, including a bad starting structure. Garbage constraints in, garbage placement out.
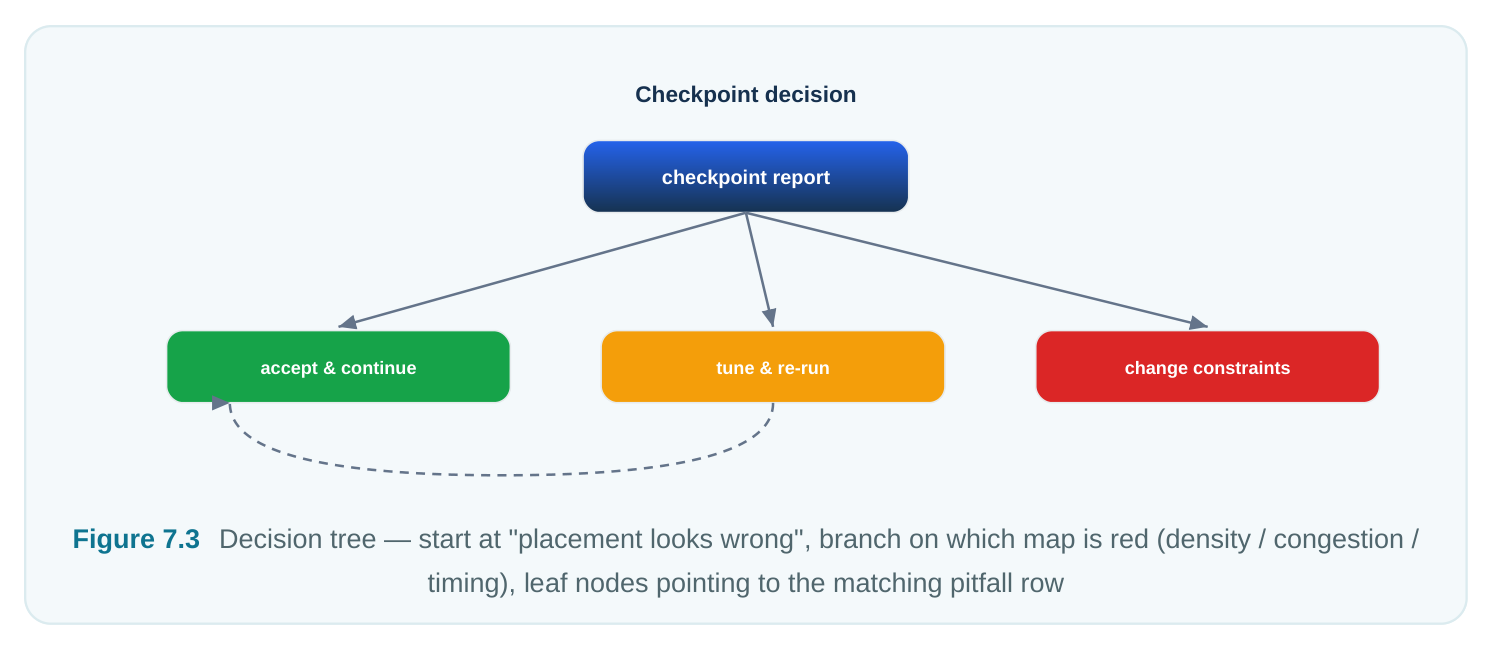
7.5 What to Tune for Which Symptom
When a review flags a problem, you rarely have time to rethink the whole flow. You need to know which one or two knobs map to the symptom in front of you. This table is the one to memorize.
| Symptom | First knob to try | Second knob | Avoid doing |
|---|---|---|---|
| Global density too | Lower target density / | Reduce padding or add | Forcing legalization on an |
| high | spread effort | area | impossible region |
| Local hotspot | Density screen / cell padding locally | Magnet or region nudge | Globally lowering density for one spot |
| Congestion | Raise congestion effort | Add routing keepout / overflow | Cranking only wirelength effort spread |
| Macros piled up | Macro spacing constraint | Macro placement | Hard-fixing every macro |
guides
| Channel too | Minimum channel-width | Move neighboring | Letting the legalizer "fix" it |
|---|---|---|---|
| narrow | rule | macro | |
| Long critical nets | Bound critical logic near | Soft macro guide driver | Over-weighting timing globally toward sink |
| WNS too negative | Tighten timing-driven | Reposition macros on effort | Ignoring it until after CTS the path |
| MSV cell escapes | Hard region bound | Domain-aware region | Soft bounds for hard rules placement mode |
| Pin access blocked | Macro orientation / | Reserve pin-side clearance | Routing-time-only workaround channel |
The general rule: change the least powerful knob that addresses the symptom. A region bound on twenty cells is safer than re-targeting global density, which ripples through the entire design and can trade one problem for three.
7.6 Consolidated Command Quick-Reference
This is the whole concurrent-placement workflow in generic command names — the same vocabulary used throughout this book. Treat it as the skeleton of a runnable script; the order is the order.
# --- 1. Set up the design and floorplan context ---
read_design
init_floorplan         -utilization <target> -aspect_ratio <ratio>
create_power_grid       -rings -straps -rails
# --- 2. Constrain the macros and regions BEFORE placement ---
set_macro_halo          -all <halo_value>
set_macro_spacing       -min <channel_min>
create_placement_region -name <domain> -bound <coords>   ;# MSV / grouping
set_placement_blockage  -hard|-soft|-partial <coords>
set_dont_touch          <pre_placed_objects>
# --- 3. Run concurrent macro + standard-cell placement ---
set_placement_options   -mode concurrent \
-effort <low|med|high> \
-timing_driven true \
-congestion_driven true \
-target_density <value>
place_design            -concurrent
# --- 4. Legalize and snap ---
legalize_placement
check_legality          -macros -cells -regions
# --- 5. Evaluate (the Section 7.1 sweep) ---
report_placement_density -map density.rpt
report_congestion        -map congestion.rpt -overflow
report_wirelength        -total -critical
report_timing            -setup -max_paths 50
report_macro_channels    -min_width -routability
check_pin_access
check_power_connectivity
# --- 6. Iterate on the offending knob, then re-evaluate ---
#   (use the Section 7.5 table to pick the knob)
# --- 7. Freeze and hand off to CTS ---
set_dont_touch          [get_macros *]
save_design             -stage placed
The shape of this script is the methodology: constrain before you place, place concurrently, legalize, evaluate across all axes, iterate with the smallest knob, then freeze. Internalize the shape and the specific command names matter far less.
7.7 Interview Cheat-Sheet — Key Concepts at a Glance
If you remember nothing else walking into the room, remember these:
- Concurrent ≠ sequential. Macros and standard cells are optimized together, so cell connectivity pulls macros into routable, timing-friendly positions instead of freezing macros blind first.
- Judge on five axes minimum: density, congestion, wirelength (total + critical), early timing, and the macro-specific trio — channels, pins, power.
- Maps over numbers. A headline figure can hide a localized disaster; always overlay density and congestion maps.
- Halos and channels are non-negotiable. Reserve them before placement, not after.
- Hard rules need hard bounds. MSV regions and don't-touch objects must be enforced with hard constraints; soft guides are for preferences.
- Most "placement" bugs are floorplan bugs. The engine optimizes what you give it.
- Smallest knob wins. Prefer local, targeted fixes over global re-targeting.
- Reproducibility is a feature. Lock seeds and ordering before sign-off.
Interview Q&A
first? Low wirelength can come from packing cells densely, which creates congestion. Open the congestion map first. Look for localized overflow and macro-edge rings, then raise congestion-driven effort or spread cells locally rather than chasing wirelength further.
routing tracks needed for the nets crossing it plus the power straps it must carry. A minimum-channelwidth rule enforced before placement is the safe way; reporting channel routability after placement is the verification.
many macros removes the freedom the concurrent engine needs to co-optimize cells and macros. It fights its own constraints, producing worse wirelength, congestion, and runtime. Fix only what physically must be fixed; use soft guides for the rest.
defined as a soft constraint or omitted from the placement context. A voltage region is a hard rule — apply a hard region bound and rerun with domain-aware placement so the engine treats the boundary as inviolable.
single check — but if forced, legality plus macro freeze. Confirm macros are legal, on-grid, and within
halos, then mark them don't-touch so CTS and routing build on a stable floorplan. Everything downstream assumes the macros never move again.
Key Takeaways
- Evaluate a concurrent placement across all axes at once — density, congestion, total and critical wirelength, early timing, and the mixed-placement specials of channel routability, pin access, and power feasibility. One clean number proves nothing.
- Read the maps. Localized hotspots and macro-edge rings reveal structural problems that summary numbers conceal.
- Use the sign-off checklist as a hard gate: density healthy, congestion within budget, macros legal with halos, channels routable, pins accessible, power connected, timing recoverable, MSV regions honored, result reproducible.
- Know the pitfall catalogue — macro pile-ups, starved channels, halo violations, escaped domain cells, over-constrained macros, congestion hotspots, blocked pins, stranded power — and remember most are floorplan problems in disguise.
- Match symptom to the smallest effective knob; avoid global re-targeting that trades one problem for several.
- The workflow shape — constrain, place concurrently, legalize, evaluate, iterate small, freeze — is the durable skill. Specific command names change between environments; the methodology does not.
Comments
Leave a Reply