 ChipBuddy
← Home
ChipBuddy
← Home
Routing Nets in the GUI
Routing Nets in the GUI
Most of the time you let the router do the heavy lifting. You hand it a placed, optimized netlist with clean tracks and good blockages, you type auto_route , and it returns a globally and detail-routed design that is overwhelmingly DRC-clean. That is the right default, and ninety-nine percent of the wires in a modern block should never be touched by a human hand. But there is always a residual tail — a clock net that the router keeps detouring, a high-current strap that wants a fatter wire than the router will give it, a pin access failure on one library cell instance, a stubborn antenna violation that survives three rounds of postroute_opt . For that tail, the layout editor in the routing tool gives you a full set of interactive routing tools, and knowing how to drive them is the difference between staring at a violation for an hour and fixing it in two minutes. This chapter is about that interactive layer: when to reach for it, what each tool does, and — critically — how to combine your hand edits with the automatic router so you fix the one net you care about without disturbing the thousands you do not.
When manual routing earns its keep
Interactive routing is not a substitute for the automatic router. It is a scalpel, and you use it for surgical cases. The most common ones:
- Debugging a routing failure. When
auto_routeleaves a net unrouted or partially routed, the fastest way to understand why is to open the GUI, zoom to the net, and try to route it yourself. The
moment you hit the same wall the router hit — a blocked pin, a track that dead-ends into a macro, a via that will not drop because of a min-area rule — you have your root cause.
- Fixing one stubborn net. Some nets fight the router. A long net crossing a congested channel, a net with awkward pin geometry, or a net the router keeps ripping up and rerouting in timing-driven mode. Sometimes the cleanest answer is to route it by hand exactly the way you want, then lock it so the router leaves it alone.
- Guided routing. You know the intent — this bus should run on M5 down the east side, this clock spine should be a fat shielded wire on M6 — but you do not want to micromanage every segment. You sketch the path with corridors and guides and let the router fill in the detail inside your constraints.
- ECO and bump-fix work. Late in the flow, a metal-only ECO might need two wires moved by a track to make room for a spare-cell tie-off. The GUI is the natural place to do that. Routing Flow Global Track Detail Postroute Route Assignment Route Opt Figure 17.1 Decision tree — "Net failed to route?" branching into Debug-in-GUI / Hand-route-and-lock / Corridor- guided-auto / Leave-to-router
The Area Push tool
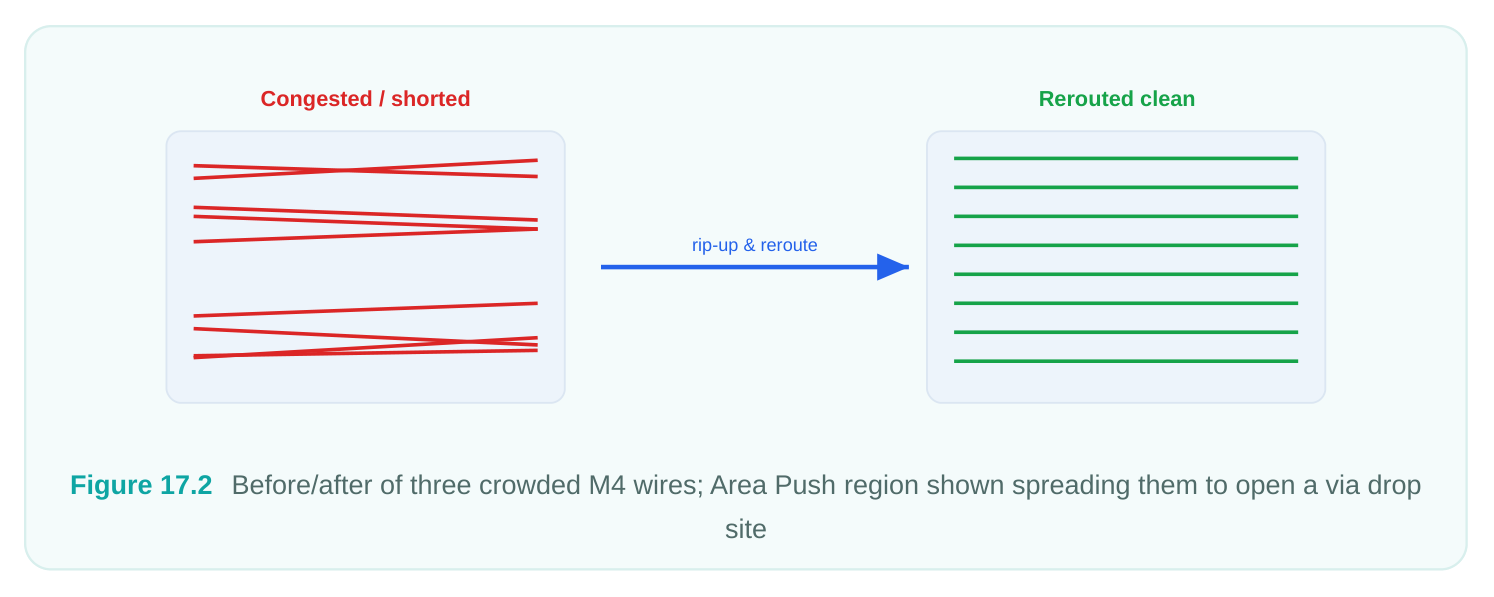
One of the most useful and least appreciated GUI tools is Area Push (sometimes called wire push or wire spreading). Picture a small region where three signal wires are crammed against each other, leaving no room to drop a via or insert a shield. Instead of manually grabbing each wire and nudging it, you select a region with Area Push and the tool spreads the existing wires apart, pushing them outward to relieve the local pinch while keeping every connection intact. Area Push is essentially local, geometry-aware shoving. It respects spacing rules as it moves wires, so the result stays legal, and it reroutes the affected segments rather than just translating them blindly. You reach for it when you have a hot spot — a couple of cells of congestion that the global picture is fine around — and you just need to make room. Typical uses: opening a gap to insert a redundant via, clearing space for a hand-routed clock wire, or relieving a DRC short cluster that the router keeps recreating. The mental model is "push the crowd back from the door." You are not rerouting the whole region; you are locally redistributing it.
Creating, editing, moving, and deleting shapes by hand
The bread and butter of interactive routing is direct manipulation of wire shapes and vias. In the layout window you can:
- Create a wire by selecting a layer, picking a start point on a pin or existing wire, and clicking out the path. The editor snaps to the routing grid and draws wire of the layer's default width unless you override it.
- Create a via at a layer transition. Click where you want the via and the editor drops the appropriate cut via (a via array, in practice — a via "device" with the right number of cuts for the wire widths involved).
- Move or stretch a segment by grabbing it and dragging. Stretching a wire endpoint extends it; moving a middle segment shifts that span while keeping the jogs at each end connected.
- Edit width or layer through the object's properties — useful for fattening a power-ish signal or bumping a segment up a layer to clear an obstacle.
- Delete a shape with the standard delete action. Deleting a segment may leave the net open, which the connectivity engine will flag immediately. The corresponding Tcl commands are what the GUI actually calls under the hood, and you should know them because they are scriptable and reproducible.
# Create an explicit wire segment on metal3 between two points
create_routing_guide -name g1 ;# (guides shown later) — here a raw wire:
create_net_shape -net DATA<7> \
-layer M3 -type wire \
-origin {120.40 88.00} -end {120.40 134.50} -width 0.10
# Drop a via at a layer transition for the same net
create_net_shape -net DATA<7> \
-layer VIA3 -type via \
-via_master VIA3_default -origin {120.40 134.50}
# Remove a hand shape if you change your mind
remove_net_shape [get_net_shapes -of_objects [get_nets DATA<7>] \
-filter "layer.name==M3"]
Every shape you create this way is real routed metal attached to the net's connectivity. That is the point — and also the danger. A sloppy hand edit creates a DRC violation just as easily as it fixes one.
Routing corridors and guides
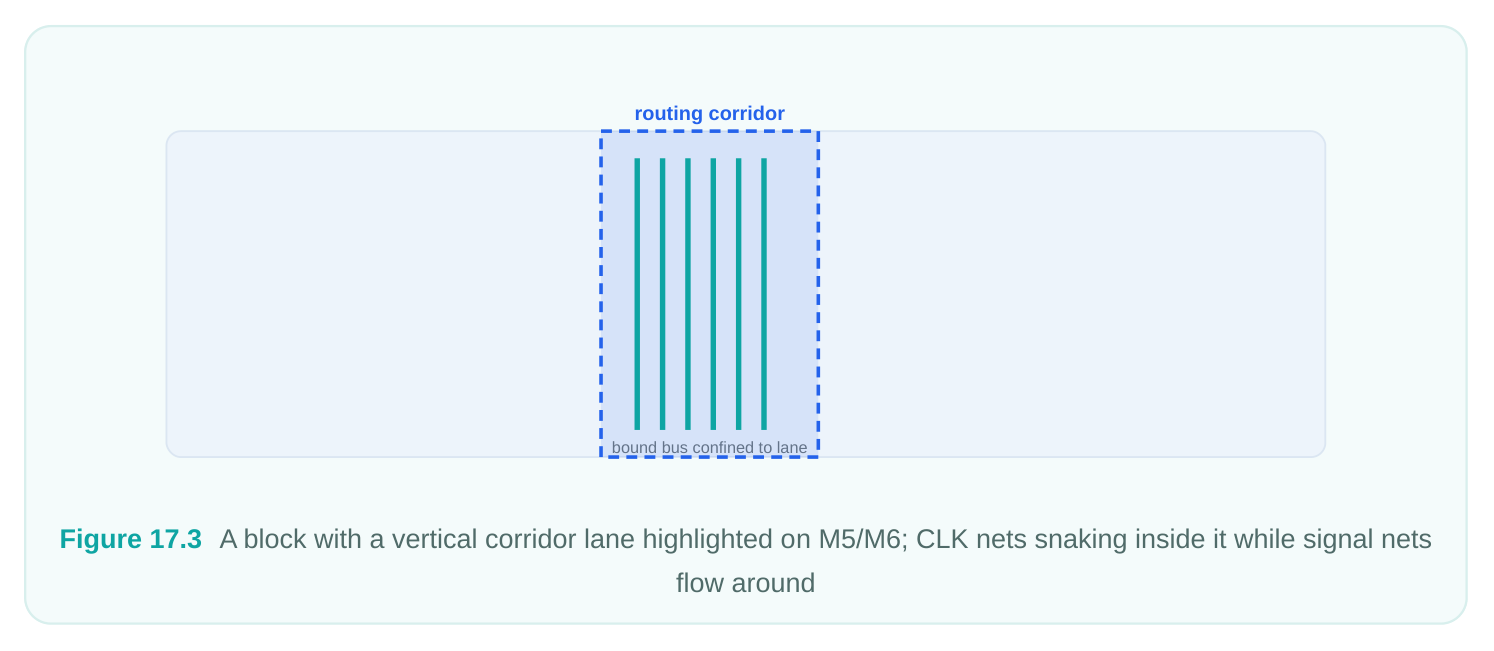
Corridors and guides are how you express intent without committing to every coordinate. A routing guide is a region you draw over the design that biases or constrains where the router puts a net's wires. A routing corridor is a stronger, channel-like construct: you define a lane, optionally with allowed layers and direction, and tell one or more nets to route inside it. The interactive workflow is: draw the corridor as a rectangle or polygon in the layout view, set its properties (which layers it permits, which nets it applies to, whether it is a hard or soft constraint), and then let the router honor it on the next routing pass. You can edit a corridor after the fact — resize it, change its layer set — and you can add shapes to a corridor, meaning you contribute pre-drawn wire that the router treats as fixed seed routing inside the lane. The table below contrasts the three levels of guidance you have available.
| Construct | What it controls | How strict | Typical use |
|---|---|---|---|
| Routing guide | Soft bias on where a net's wires prefer to go | Advisory; router may leave it | Steer a bus toward one side of the block |
| Routing corridor | A defined lane with allowed layers/direction | Hard or soft, configurable | Confine a sensitive net to a clean channel |
| Hand-routed + | Exact geometry, frozen | Absolute locked wire | A clock spine that must not move |
# Define a corridor over a rectangular region, restrict to M5/M6,
# and bind it to a couple of sensitive nets
create_routing_corridor -name clk_lane \
-boundary {{200 300} {260 540}} \
-layers {M5 M6} \
-nets {CLK_SPINE CLK_BRANCH}
# Add a pre-drawn seed shape into the corridor so the router builds around it
add_to_routing_corridor -corridor clk_lane \
-net_shapes [get_net_shapes -of_objects [get_nets CLK_SPINE]]
# Route only those nets, honoring the corridor
route_net_group -nets {CLK_SPINE CLK_BRANCH} -reuse_existing_global_route true
The big advantage of corridors over fully hand-routed wires is that you keep the router's DRC awareness and via optimization while still imposing the high-level plan. You say where; the router still figures out exactly how, legally.
Inserting metal in the preferred direction and managing cut shapes
Two related editing tasks come up constantly during cleanup. The first is inserting metal in the preferred routing direction. Every metal layer has a preferred direction — say M4 horizontal, M5 vertical. When you hand-add wire, you almost always want it running with the grain of the layer, because off-direction routing burns tracks, creates jogs, and invites spacing problems. The editor has an explicit "add wire in preferred direction" mode that constrains your strokes to the layer's grain so you stay on-track by construction. Use it; freehand diagonal-ish routing is how hand edits go bad. The second is cut metal shapes. On advanced nodes, layers are not continuous sheets — they are cut into segments by metal-cut (also called CutMetal or trim) shapes that enforce coloring and line-end rules. When you hand-edit, you sometimes need to insert a cut shape to break a piece of metal into two electrically separate pieces, or remove a cut so two pieces merge. Getting these wrong produces
opens (a cut where you needed continuity) or shorts and DRC errors (missing cut where the rule demands one). Always re-check connectivity and DRC after touching cut shapes — they are easy to get subtly wrong.
| Edit action | GUI mode | Related Tcl | Watch out for |
|---|---|---|---|
| Add wire on-grid | Add Wire (preferred | create_net_shape -type dir) | Off-direction jogs, off-track wire |
| Drop via | Add Via | create_net_shape -type via | Wrong via master / too |
few cuts
Insert cut metal Add Cut Metal create_cut_metal_shape Creating an unintended
Remove cut metal Delete Cut Metal remove_cut_metal_shape Re-merging shapes into a
Spread crowded Area Push (interactive) Pushing into a blockage
# Insert a cut to split a wide M4 shape into two isolated segments
create_cut_metal_shape -layer M4 \
-boundary {{150.00 220.00} {150.20 224.00}}
# Remove a cut that is wrongly isolating two halves of one net
remove_cut_metal_shape [get_cut_metal_shapes \
-filter "layer.name==M4" -within {{150 220} {151 224}}]
Combining hand edits with the automatic router
This is the part that separates a clean fix from a regression. The pattern that works is freeze what you trust, then let the router do the rest. When you hand-route a net the way you want it, you mark it so the router will not rip it up. In the routing tool the usual mechanisms are setting the net or its shapes to a fixed/locked state, or attributing the net so it is excluded from rerouting. A "fixed" shape is treated like a pre-route: the router routes around it and will not modify it. A "locked" net is one the router leaves entirely alone. Once your sensitive wires are frozen, you run the router on everything else and it honors your geometry as an obstacle to respect rather than a candidate to optimize.
# 1. Hand-route CLK_SPINE in the GUI (or via create_net_shape), then freeze it
set_net_routing_rule CLK_SPINE -rule clk_shield_2w2s ;# optional NDR
set_routing_status -nets CLK_SPINE -status fixed ;# treat as pre-route
# Alternatively lock just the shapes you drew
set_attribute [get_net_shapes -of_objects [get_nets CLK_SPINE]] \
is_user_shape true
# 2. Let the automatic router finish everything else, leaving CLK_SPINE intact
auto_route -reuse_existing_global_route true
# 3. Incrementally clean up DRCs the hand edit may have introduced nearby
detail_route -incremental true
The discipline here is sequencing. Do your manual work first, freeze it, then invoke the router. If you route automatically and then hand-edit, the next postroute_opt pass may happily undo your work unless it is frozen. And after any hand edit near other routing, always run an incremental detail-route or DRC check on the affected region — your edit changes the spacing environment for the neighbors, and the router needs a chance to legalize around it. Routing Flow
| Global | Track | Detail | Postroute |
|---|---|---|---|
| Route | Assignment | Route | Opt |
Figure 17.4 Flow — Hand-route net → set_routing_status fixed → auto_route (rest of design) → incremental
detail_route → check_routes
Good practice: on-grid and DRC-aware, always
Two habits keep interactive routing from becoming a liability. Stay on-grid. Every wire you draw should land on the routing track grid and snap to legal coordinates. Off-grid metal is the single most common way hand edits create violations and confuse the router — an off-track wire forces the router to jog around it and can defeat via insertion. Keep grid snapping on in the editor, route in preferred direction, and verify that your endpoints sit on tracks. The router is built around the track grid; your hand work should live on the same grid. Stay DRC-aware. Treat every hand edit as a potential violation until proven otherwise. After a session of interactive routing, run a connectivity check and a DRC check on the region you touched before you move on.
# Verify connectivity and legality after interactive edits
check_routes ;# opens, shorts, antenna, etc.
check_drc -within {{180 280} {280 560}} ;# DRC on the region you edited
If check_routes reports an open, you probably deleted a segment or missed a via. If it reports a short, you likely pushed a wire into a neighbor or removed a cut you needed. Fix, recheck, and only then consider the net done. The goal is that your manual edits are indistinguishable from router output in quality — on-grid, legal, and stable across subsequent optimization passes.
Interview Q&A
do you keep the router from undoing your work? You hand-route when a net is genuinely special or when the router keeps failing on it — a clock spine that needs an exact shielded path, a net with pin-access problems, or a stubborn detour you can route better manually. To protect the work, you freeze it before invoking the router: set the net's routing status to fixed (so it is treated as a pre-route the router routes around) or lock the shapes, optionally attach a non-default rule, and only then run auto_route . Sequencing matters — manual edit, freeze, then auto-route the rest.
existing wires apart within a selected region, respecting spacing rules as it shoves them, to relieve a congestion hot spot. It is the right tool when you have a small crowded area — not a global congestion problem — and you need to open room for something specific: a redundant via, a shield, or a handrouted wire. It redistributes existing routing rather than rerouting the whole region, so it is fast and surgical.
spectrum from soft to hard. A routing guide is a soft bias suggesting where a net's wires should prefer to go; the router can deviate. A corridor is a defined lane, optionally restricted to certain layers and directions, that can be a hard or soft constraint, and you can seed it with pre-drawn shapes — it lets you dictate where while the router still solves exactly how, legally. A hand-routed, locked wire is absolute: exact geometry, frozen, the router cannot touch it. Use the lightest construct that achieves your intent so you keep the router's DRC and via optimization wherever possible.
do you check, and what do common failures indicate? Run check_routes for connectivity (opens, shorts, antenna) and check_drc scoped to the region you edited. An open usually means a deleted segment or a missing via, or an unintended cut metal shape splitting the net. A short or spacing error usually means a wire pushed into a neighbor, off-grid metal, or a removed cut that remerged two pieces. Also confirm everything is on-grid and in the preferred direction — off-track metal is the most common silent cause of downstream router trouble.
Key Takeaways
- Interactive routing is a scalpel, not a replacement for the automatic router — use it for debug, one stubborn net, guided routing, and ECO fixes.
- Area Push locally spreads crowded wires to open room while respecting spacing, ideal for hot-spot relief like via drops or shielding.
- You can create, move, stretch, edit, and delete wire shapes, vias, and cut metal directly; each maps to a
create_net_shape/create_cut_metal_shapestyle Tcl command. - Corridors and guides express intent — confining a net to a clean lane on chosen layers — while letting the router solve the legal detail; seed them with shapes when you want fixed sub-routing.
- Always add metal in the preferred direction and handle cut shapes carefully; a wrong cut creates opens or shorts.
- Freeze your manual work (fixed status / locked shapes) before running
auto_route, then incrementally legalize around it. - Keep every edit on-grid and DRC-aware, and verify with
check_routesand a scopedcheck_drcbefore declaring a net done.
Comments
Leave a Reply